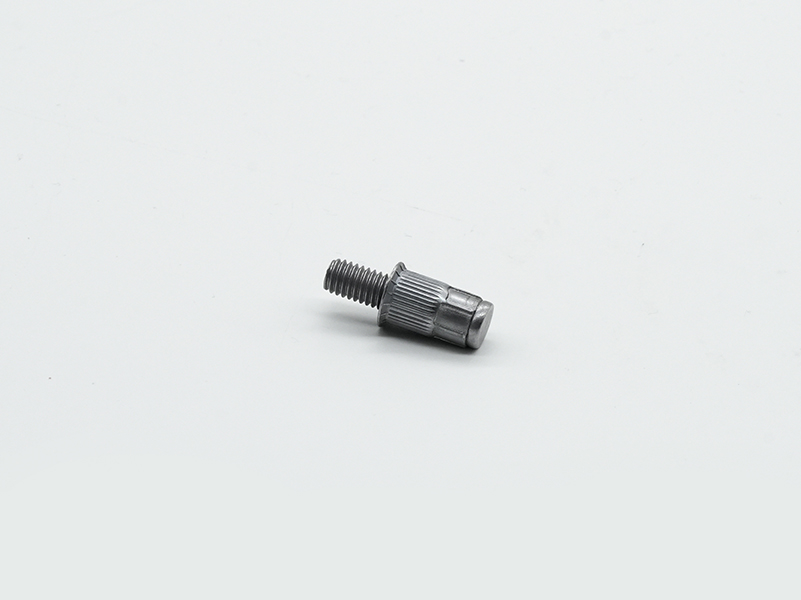
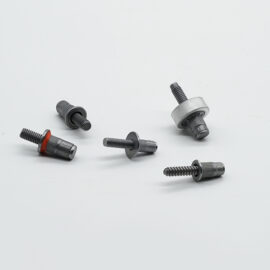
BSL® pull rivet studs can achieve non-destructive and quick connection of prefabricated holes on automotive sheet metal, and provide external thread support.
BSL® pull rivet studs are made by pressing rivet nut parts and bolt parts together. The studs are connected to sheet metal holes at one time by pull rivets, providing external thread support, and can also meet the requirements of anti-loosening, anti-rotation, waterproof sealing, etc.
Usage scenarios
Connection features:
1. Provide threaded connection for thin metal plates; solve the problem of easy melting and deformation of welding bolts for thin metal plates and thin tubes;
2. Single-side installation, high efficiency
3. Firm riveting
4. Low installation cost
5. Adaptable to riveted plates of various materials (steel, aluminum, plastic, etc.)
BSL® pull rivet studs are divided into flat head type, countersunk head type, hexagonal type, and cylindrical outer pattern type according to the head and rod type of the rivet nut.
According to the requirements of anti-loosening and sealing and waterproofing, two gluing methods can be combined: gluing at the screw part and gluing at the root of the nut flange.
size
| Product Code | D | d | dk | k | L | L1 | d0 | h1 | h |
| Nominal | Max | Max | Max | Max | refer to | recommend | refer to | recommend | |
| B1142-YW-050145_100 | M5 | 6.98 | 9 | 1 | 14.5 | 10 | 7.0-7.2 | 12.5-14.0 | 0.5-3.0 |
| B1142-YW-050145_150 | 15 | 17.5-19.0 | |||||||
| B1142-YW-060175_150 | M6 | 8.98 | 11.5 | 1.2 | 17.5 | 15 | 9.0-9.2 | 17.5-19.0 | 1.0-3.0 |
| B1142-YW-060175_200 | 20 | 22.5-24.0 | |||||||
| B1142-YW-060175_250 | 25 | 27.5-29.0 | |||||||
| B1142-YW-060175_300 | 30 | 32.5-34.0 | |||||||
| B1142-YW-060195_150 | 19.5 | 15 | 17.5-19.0 | 3.0-5.0 | |||||
| B1142-YW-060195_200 | 20 | 22.5-24.0 | |||||||
| B1142-YW-060195_250 | 25 | 27.5-29.0 | |||||||
| B1142-YW-060195_300 | 30 | 32.5-34.0 | |||||||
| B1142-YW-080185_150 | M8 | 10.98 | 14.5 | 1.5 | 18.5 | 15 | 11.0-11.2 | 17.5-19.0 | 1.0-3.0 |
| B1142-YW-080185_200 | 20 | 22.5-24.0 | |||||||
| B1142-YW-080185_250 | 25 | 27.5-29.0 | |||||||
| B1142-YW-080185_300 | 30 | 32.5-34.0 | |||||||
| B1142-YW-080205_150 | 20.5 | 15 | 17.5-19.0 | 3.0-5.0 | |||||
| B1142-YW-080205_200 | 20 | 22.5-24.0 | |||||||
| B1142-YW-080205_250 | 25 | 27.5-29.0 | |||||||
| B1142-YW-080205_300 | 30 | 32.5-34.0 |
Performance Table
| Thread specification D
(mm) |
Thread load protection
(N)Min |
Breaking torque
(N.m)Min |
Rotational torque
(N.m)Min |
| M5 | 8230 | 7.6 | 2 |
| M6 | 11600 | 13 | 4.5 |
| M8 | 21200 | 33 | 5.5 |
Surface treatment
| distinguish | Materials | Material grade | Material Standards | Connection strength | Surface treatment and protection level
(Based on neutral salt spray test conditions) |
Waterproof requirements |
| Nuts | Mild Steel | SWCH10A | JIS G3507-1 | —
|
Intermediate: zinc-plated trivalent chromium passivation, 5um or more, 72H no white rust
Heavy: zinc-plated nickel alloy, colorless passivation, 8-25um, 480H no white rust |
The nut flange is basically coated with glue to meet the IP67 sealing level requirements.
|
| 螺杆 | 中碳钢 | SWCH35K
10B21 |
JIS G3507-1 | 9.8级/10.9级 |
| variety | Material | Surface treatment | ||
| Nuts | Screw | Nuts | Screw | |
| Countersunk Half Hexagon | SWCH10A | SWCH35K
10B21 |
Galvanized
/Zinc-nickel alloy |
Galvanized
/Zinc-nickel alloy |
Installation Method
1 Product installation steps
1) Select a pneumatic rivet stud gun that matches the pulling force, install a nozzle that matches the diameter specification, and adjust the appropriate riveting stroke according to the installation thickness and the tool manual;
2) Load the product and perform an empty pull test;
3) Perform a real riveting test on the test sheet metal, as shown in step 1 below.
4) Observe whether the clamping state of the product is normal after installation.
5) (To determine whether the installation fails, please refer to the following article – Product installation failure mode pictures)
1.2 Operation steps
Hold the product and gently push the screw into the gun head. Note that the product should be kept in a vertical direction. At this time, the tool gun head automatically rotates, screws in the screw until it is close to the nut plane, and then inserts the tool into the installation hole in a direction perpendicular to the sheet metal plane and close to the sheet metal surface, then pulls the trigger, the screw rotates forward to start riveting, and the gun head automatically rotates back to the position after the stroke reaches the end. At this time, one riveting action ends, and then the next working cycle is carried out.


